I have been homelabbing now for many years and I’ve been working on various virtualization platforms for 5+ years now. I’ve built VMs on ESXI, Xen, and now Proxmox. While managing your homelab, you will find that you want different VMs for different services. The problem with this is that you need to now maintain multiple VMs and/or physical servers – enter Ansible.
In my lab, I have a number of different servers with lots of different functions. Let’s get some examples:
- Docker Server – development and containerized apps
- GitLab – personal code management
- This website!
I now have over 30+ active VMs across multiple servers in multiple geographic locations that I maintain for both on-site and off-site use. For this reason, it becomes increasingly more and more relevant to have automations to ensure consistency for various aspects of their configuration to ensure consistency, security, etc. Let’s look at some of the automations I’ve been working on. I don’t claim to be an expert on Ansible, so follow along learning with me about Ansible and how to get started with your own automations.
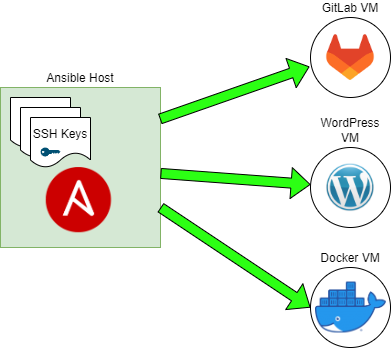
Let’s talk about how Ansible works and initial deployment. Taking a look at the image below courtesy of IBM (take a look at the link for more info), we can see that Ansible uses SSH to deploy packages, files, configurations, etc to hosts. Ansible has loads of great built-in modules for handling package updates, replacing lines in files, applying updates, etc. In my homelab journey, I’ve been slowly working to automate some of the initial deployments of my VMs and servers so that I can get into the work at hand.

Taking a look at the example from IBM above, we can see that Ansible can be used to maintain automations across multiple environments. Starting with simply an inventory file, you can define aliases for your servers and then use “playbooks” to run a set of tasks on that list of servers. A huge thanks to Jeff Geerling for a great series on Ansible 101 on YouTube for getting me started on this.
Let’s get into the nitty gritty of how I use Ansible to deploy configurations to my VMs. I’ve been playing around with Ansible the last few weeks to come up with a number of automated configurations.

I install Ansible on a “Master Control Node” as I like to call it. Here I’ll call it “Ansible Host”. Ansible itself is configured here. SSH keys are generated on the Ansible host machine and the public keys distributed to the remote VMs so that they can accept connections over SSH without needing a password. It’s important to ensure that SSH is locked down so that other folks that might attempt to gain access to your network would not be able to login to your servers. This also can be used as user access control for legitimate users on the network to prevent them from gaining access to machines they should have access to. I’m hoping I can cover this in a later blog post.
After setting up SSH keys, we’re ready for some configuration. Here’s a sample inventory file we can use for reference:
#inventory
[1804-servers]
wpress1.lan
gitlab1.lan
docker1.lan
An inventory file will look like this and defines the hosts we’re looking to deploy to. Save this to “inventory” (no extension). In this case, I’ve called this group of servers “1804-servers” as I will look to only deploy this to my Ubuntu 18.04 VMs and not the others. There is a specific issue with DNS resolution I want to deploy a workaround for to fix DNS lookups on my network.
I also needed to setup an “ansible.cfg” file so that my ansible host knew where my inventory was defined. Throw the following lines into your file:
#ansible.cfg
[defaults]
INVENTORY = inventory
If your configuration is setup correctly, you should be able to run an ad-hoc command by doing something like the following (in this case, “brandon” is the user ansible is using to log into the remote machine):
ansible 1804-servers -a “ls -l” -u brandon
Next, it’s good to organize your playbooks into a directory. If your ad-hoc command succeeded, it’s time to start our first playbook. The playbook I’ll be referencing first is “install_packages.yml”. All main package installations should be in this playbook. For this initial testing, I kept it pretty simple. I like “vim” over “nano” in my SSH sessions and I really like this package called “neofetch” that gives you great server stats on login. Let’s install those with this playbook
- hosts: ubuntu-servers
  remote_user: brandon
  become: yes
  tasks:
    - name: Update apt cache and make sure Vim is installed
      apt:
        name: vim
        state: present
        update_cache: yes
    - name: Install neofetch
      apt:
        name: neofetch
        state: present
        update_cache: yes
    - name: check if neofetch in bashrc
      shell: grep -c "neofetch" /home/brandon/.bashrc || true
      register: neofetch_check
    - name: add neofetch to bashrc
      ansible.builtin.lineinfile:
        path: /home/brandon/.bashrc
        line: "neofetch"
      when: neofetch_check.stdout == "0"
Let’s break the playbook down
- Install vim
- Install neofetch
- Update .bashrc to run “neofetch” on startup
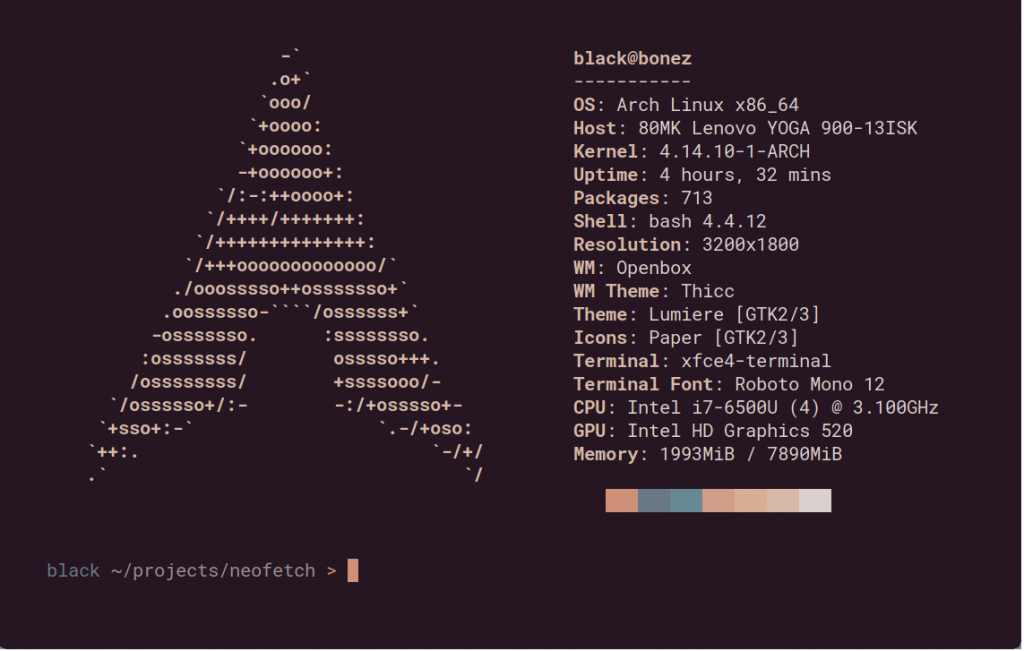
First, this playbook checks that vim is installed and if it is, it’ll skip it, otherwise it will do “apt install vim” and install it. Same with neofetch. This is great so far. The real tricky part of this was to get the second half of this script. You see, the command “neofetch” should be run on user login to show the useful server stats.

The above image is courtesy of the GitHub page for neofetch. Pretty cool right? We want to run neofetch on server login for user “brandon”. To do this, you need to add “neofetch” to the end of /home/<user>/.bashrc – aka “/home/brandon/.bashrc” right at the bottom. However, we don’t want to just add it willy-nilly because otherwise we’ll get multiple runs of the neofetch command on login. We can avoid this by first searching for “neofetch” in the .bashrc file. If it is not present, ansible we see this and skip it (see below). Excellent! So let’s run this thing.

If you’ve followed along this far, your working directory should have ansible.cfg, inventory, and a playbooks folder (ignore the other test stuff from my environment).

If everything is setup correctly, you should see output like this:

Here we see the playbook starting. It first logs into each server to check if it can login. It then checks to see if vim is installed.
Then, we see it check that neofetch is installed.

Then, it will check that neofetch is in .bashrc in /home/brandon/.bashrc. You’ll see I’ve already run this, so it recognizes that neofetch is installed and is already in .bashrc. You’ll see “check if neofetch in bashrc” results in “changed”. This is because our statement “shell: grep -c “neofetch” /home/brandon/.bashrc || true” resulted in “True”, so that is expected.

This was a very lengthy article, but I hope it helps put the pieces together for someone else getting started with Ansible. I hope to do more articles on Ansible in the future and cover some more interesting topics on it. What would you like to automate next?
Love the blog posts and the enthusiasm for ansible! Can’t wait to see more content in the future!
Testing Timezone Fix